
Ribbon Stitch
( Japanese Ribbon Stitch )
 |
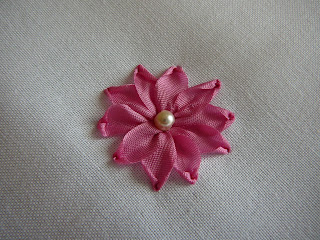
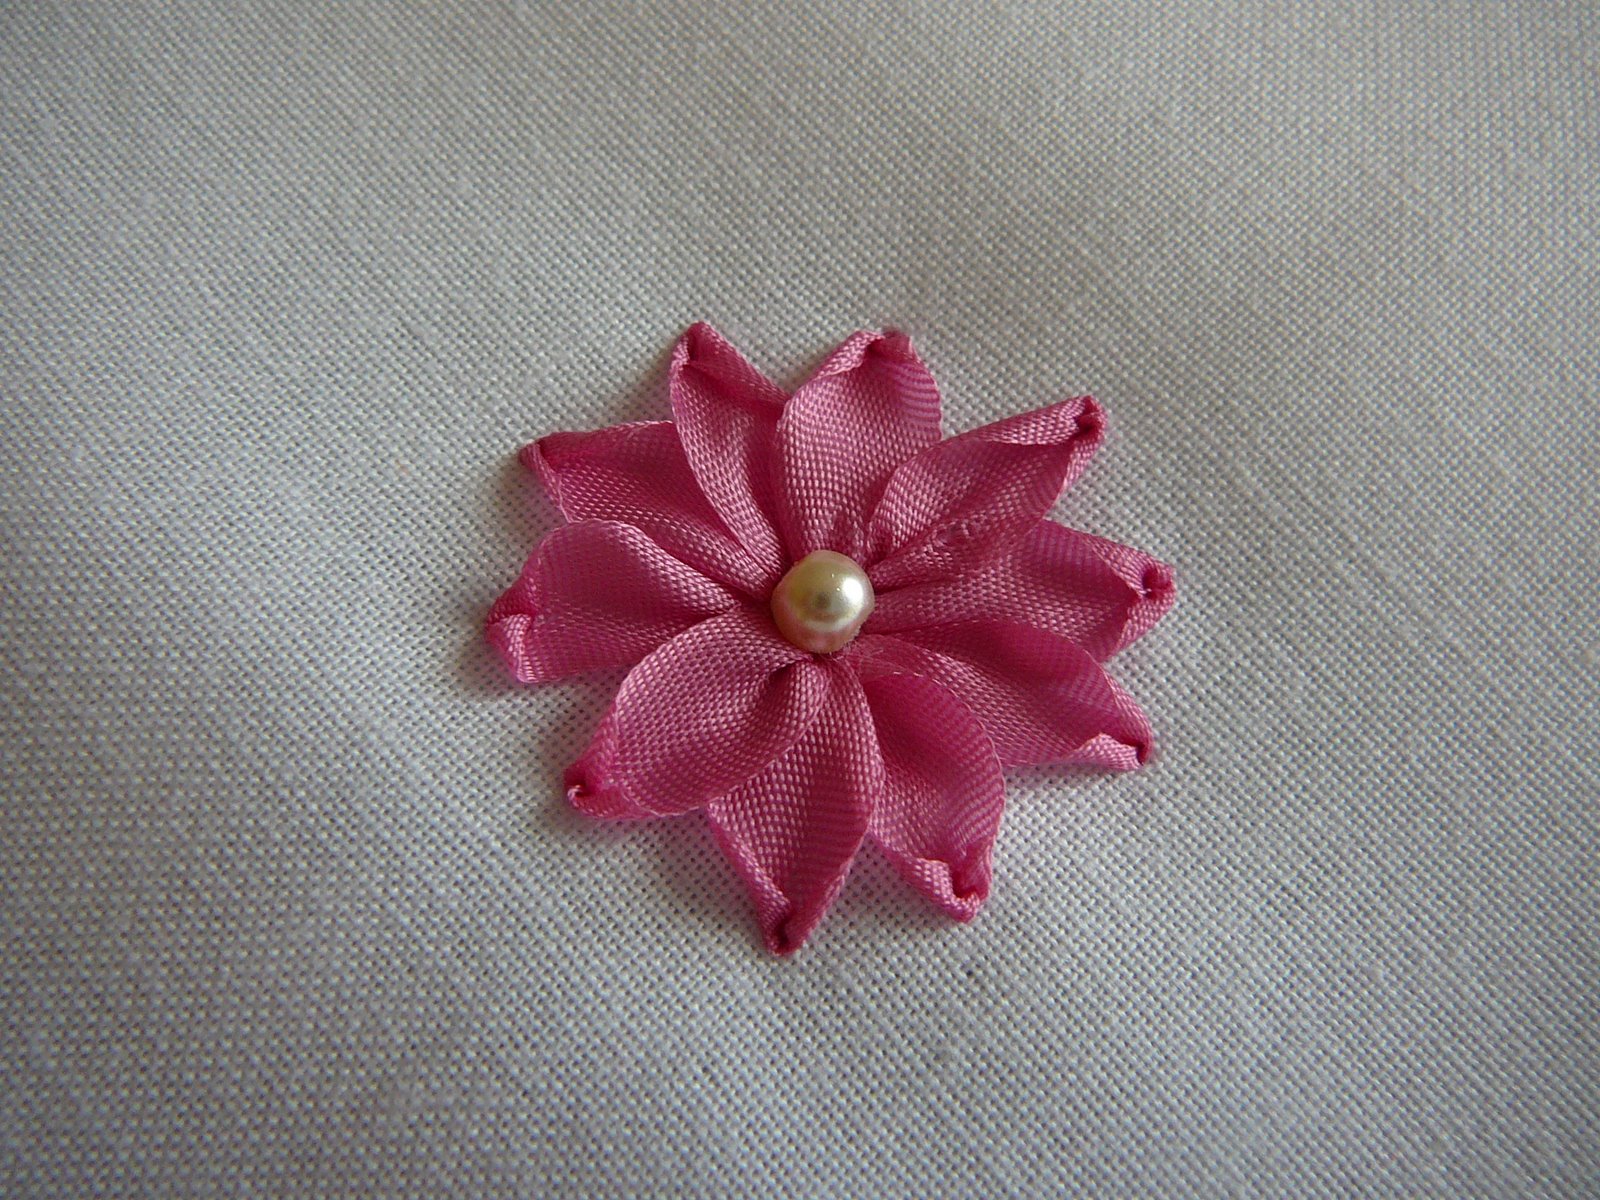
| Daisy Ring - Ribbon Stitch |
A basic stitch that enables you to create a wide variety of flowers, leaves even insects.
Can be executed with ribbons from 2 mm up by adjusting the size of the chenille needle to suit.
If needed use a water soluble marker to create
an inner circle and outer ring to assist with
the needle placements.
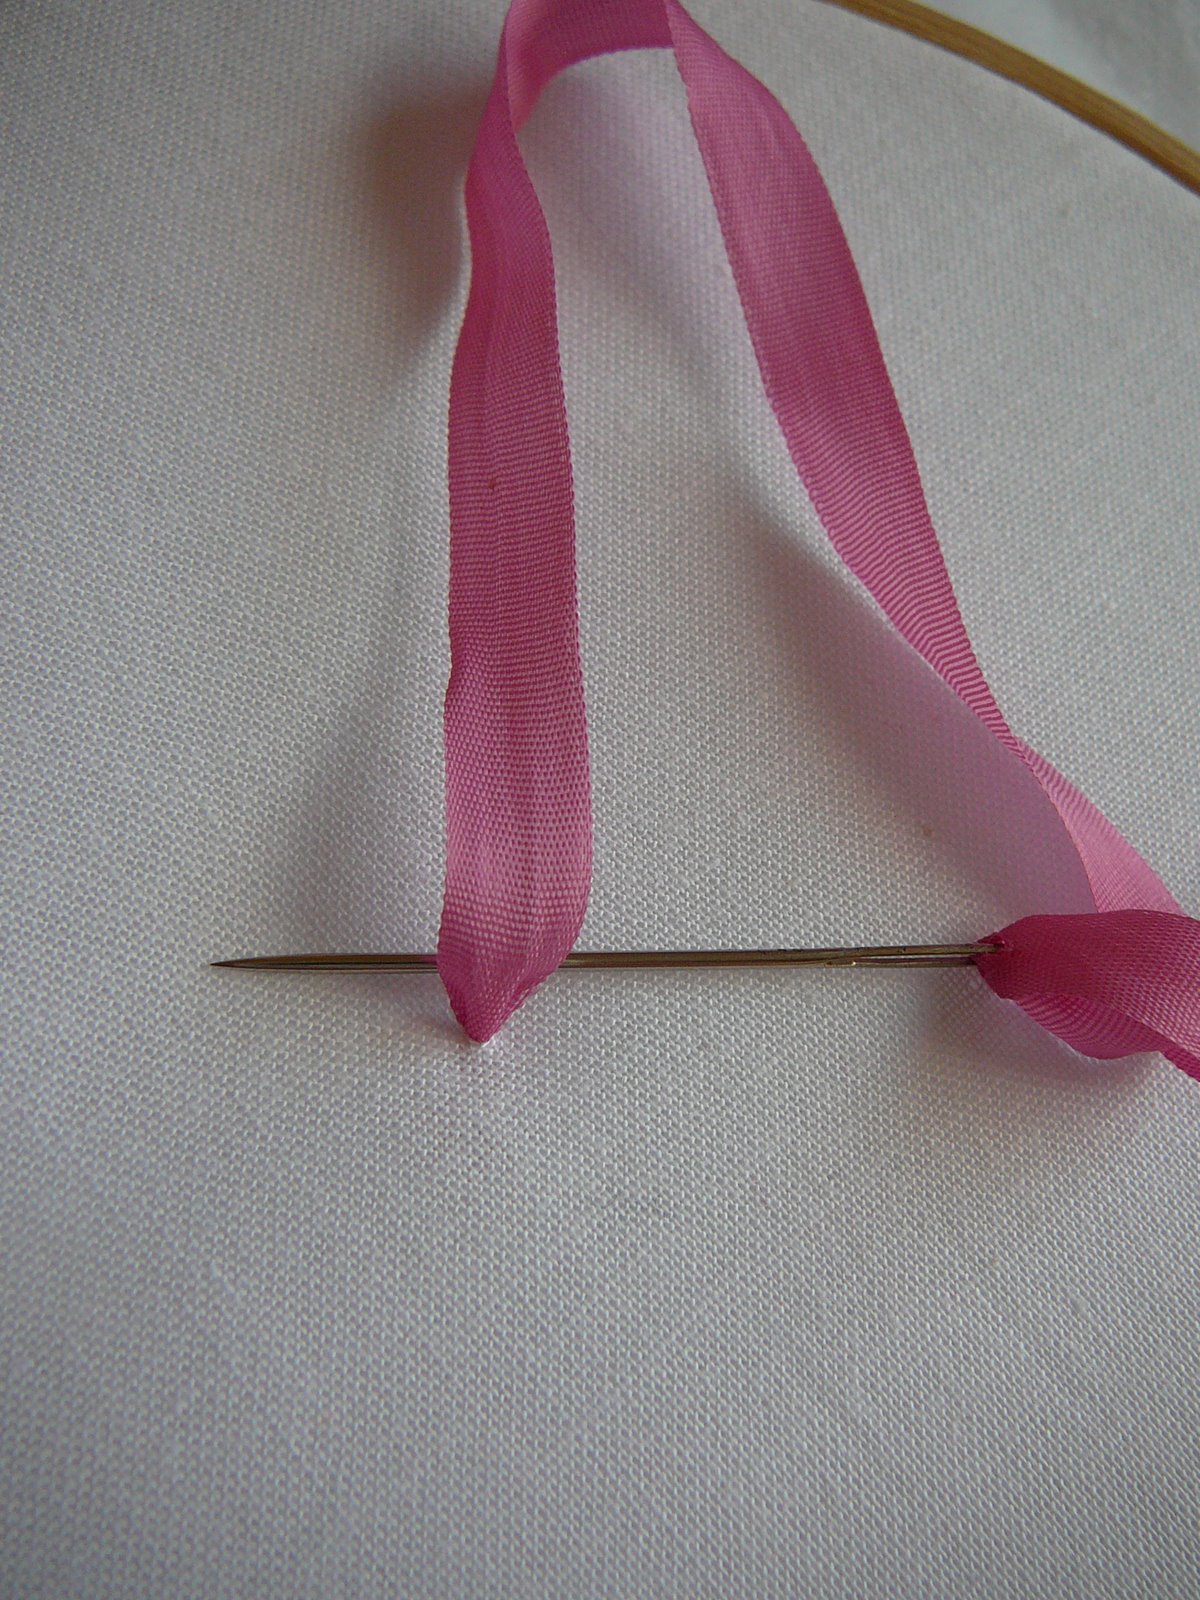
Thread your needle, bring the needle up to the front at
the point of the first stitch. Move the needle under the
ribbon to straighten as
much as possible.

Place the needle in the centre of the ribbon,
at the length that you require your petal to be.
Pull the needle through slowly, I place my left ring finger on the ribbon at this time.


This helps to not pull too tight and enables you to stop the length of
ribbon twisting.

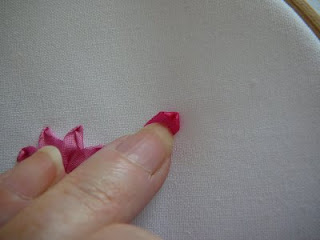
Should you want the petals to be rounded at
the tip, use your fingernail for shaping
as you pull the ribbon through.
If a more pointed petal tip is needed, pull the needle and ribbon to the right away from the
worked petal.
Continue around the full circle, placing a bead or French knots in the centre.
Notice the change once this is
added.

Making a folded stitch, is a simple case
of inserting the needle
to the left or right edge
of the ribbon, thus it
twists a little as you
pull it through.

The addition of buttons and a bee in 4 mm. Silk Ribbon. Daisy Buds are a simple cluster of Ribbon Stitch and a grouping of Ribbon Stitch in green
shaped as a bell.
( Also prevents you from pulling too tight ).
Pointed petals- by holding the ribbon stitch firm with your finger, pull the ribbon through and pull it to the right ( go gently until you get the required tip ).
Pulling the ribbon to the side or downwards a little will give it a small curl or place the needle through to one side of the ribbon will create a folded ribbon stitch.
If you are feeling adventurous and want to begin on a
Ribbon Stitch Hints and Variations
Moulding the shape of the petal:
Rounded petals are achieved by holding the ribbon down with your fingertip and shaping the ribbon outer edge around your nail as you are pulling it through. ( Also prevents you from pulling too tight ).
Pointed petals- by holding the ribbon stitch firm with your finger, pull the ribbon through and pull it to the right ( go gently until you get the required tip ).
Pulling the ribbon to the side or downwards a little will give it a small curl or place the needle through to one side of the ribbon will create a folded ribbon stitch.
If you are feeling adventurous and want to begin on a
project, free designs are listed on the side bar.

Enjoy your time working with Silk Ribbon, but remember you are imitating nature, and even nature has imperfections in its work.

Carol Daisy
Hellow Carl Daisy
ReplyDeleteI'm starting to learn silk ribbon embroidery
and I thank God for let me found your blogspot. Thankyou for share all your knowledge and experience in this labour with all of us. God bless you.
Carmen Pinto (from Lima-Perú)